VPS Security; How To Secure Your VPS to Not Get Hacked?
How to learn about VPS security windows or secure VPS hosting? Web content security is becoming the biggest concern for the website that stores customers’ private information online. VPS hosting has given us the ability to store the data on the remote server with added security measures and protect the data from attacks.
Nowadays, VPS hosting security is, by all accounts all over the place, a concern discussed among huge organizations and people with an online presence.
Furthermore, in light of current circumstances. Cyber threats are genuine and should not be trifled with stolen financial and personal information, data leaks, and website content.
This article will explicitly address security measures for Virtual Private Server (VPS) Hosting, where we’ve identified approaches to keep your VPS secure.
Why Should You Secure Your VPS?
There are several vulnerabilities in web hosting today. The data stored on the dedicated servers with multiple protections can get hacked, and users’ data will be lost on the public platform.
Stolen financial and personal information is sold on the dark web, and some files are leaked on the public platforms by hackers. Study shows that cyber-attacks have picked the speed in recent years.
The top companies in the world have recorded many DDoS attacks on popular platforms. These attacks can demolish the website content and leak the data to the public forum.
We will discuss how VPS security works and protect personal information from hacking. The guide will answer one of the most common questions on the web “how to secure VPS?”
In the case you aim to know the difference between public and private cloud , this post can guide you!
Can a Vps be Hacked?
Yes, VPS is definitely hacked!Every server and web host has ways to penetrate, not far from hackers. The more you make the security of a site or VPS server better and more secure, the only way you can block novice hackers or make it harder for solid hackers. However, everything can be hacked, even Apple, Microsoft, and NASA!
How To Secure VPS?
1) Installing Fail2ban
Fail2ban is the log parsing algorithm that keeps an eye on every activity happening on the server in system logs. The application tracks the automated attacks on your server from an unknown source and alerts the users.
Too many password failures, exploitation of the files, and injecting data into the file are recorded in the malicious signs. You will find the scan log files stored on the server, for example, “/var/log/apache/error_log,” and ban the IP address.
2) Using complex and unpredictable passwords
Once you get control of your VPS hosting server from your service provider, the first thing that you should do is to change the password. Use a strong password that is unpredictable and more personalizes only you can remember. It will ensure VPS security and avoid data breaches.
The Brute force attacks generally focus on the servers’ ordinary passwords. Brute force attacks are made to infiltrate your system. Complex passwords are difficult to crack. It is nearly impossible to reach your files on the server when the password is secure.
- Tips for choosing the strong password
- Use a minimum 12 character password
- Mix the password with upper and lower case letters
- Use the combination of numbers and letters
- Put some non-numeric and non-letter characters in the password
3) Disable Protocol 1
The SSH service is designed to work on two primary protocols named protocol one and protocol 2. Protocol 1 is less secure compared to protocol 2. So it is advisable to use protocol two while using the VPS hosting for communications.
- Before you start using protocol 2, ensure to disable protocol 1. Else it will be accessible to the users. Hacker will use it as the backdoor to enter the server.
- Open the sshd_config file using the editor.
- nano /etc/ssh/sshd_config
- Find the below statement and change it to “protocol 2.”
- # Protocol 2,1
- Protocol 2
- Once the changes are successfully applied, restart the SSH server and save the file.
- Use the command
- service ssh restart
4) Disable IPv6
IPv6 comes with many advantages. It has become the first choice of a hacker to attack mass websites with an automated script. IPv6 is not used often. Hence you have special requirements for your website.
Consult with your developer and see if they need the IPv6 support on the VPS hosting server. If it is not in use, disable it immediately. IPv6 receives malicious traffic. Blocking them would put your data secure by secure vps.
- To disable IPv6 on your server, go to the below file path.
- /etc/sysconfig/ network
- And update the settings.
- You will read the file as NETWORKING_ IPV6 = no and IPV6INIT = no.
5) Use GnuPG Encryption
In most cases, the data is hacked during the transition from one place to another. Hence, encryption is essential to protect the data from the leak and is accessible to the hacker. GnuPG is used to encrypt the data over the network and authenticate the system.
The system consists of the public key that only gets described using the private key available with the recipient. Without the private key, the system trying to decrypt will not be able to crack it.
If you are interested to know how to prevent session hijacking, don’t miss this post!
6) Use SFTP Instead of FTP
What is FTP? FTP is the oldest file management tool. FTP no longer considered the secure port to access the file on the server by secure vps. Even the server feels the “FTP over TLS” connection is not secure.
Both the connection FTPS and FTP is vulnerable to hacking. On the other hand, SFTP, also known as the FTP over SSH, would encrypt the data and secure the server.
7) Activate cPHulk in WHM
You also get an additional “cPHulk” brute force security system on your VPS server with the firewall security. The firewall also comes with a limitation. Sometimes the firewall makes mistakes in identifying the anonymous entry, which generally occurs due to incorrect firewall settings in the system.
Availability of the cPHulk security system gives double protection to your server with the firewall. Prevent any brute force attack and protect the server from data leakage. When unusual activities are detected on the server, cPHulk blocks the login features of the server. The firewall later blocks the entire IP.
You can activate the cPHulk on your VPS server by going to the WHM Security centre. Choose the cPHulk brute force protection and activate the feature on your server. cPHulk will enhance the security of your server.
8) Install a Rootkit Scanner
A rootkit is a devil of the server installed on your system at the operational level. It becomes hidden to all the security software that scans only the upper level of the files and ignores the operating system files. A rootkit is undetected mainly on the server until you manually check or use a special rootkit scanner to identify the file.
Use the Chrootkit; an open-source tool developed to find the infected files on the server. Remember that the Chrootkit may not offer you 100% guarantees to detect the rootkit virus on your operating system. The only way to remove the rootkit is to reinstall the operating system.
+
If you are willing to compare vds vs VPS, this article can help you!
9) Audit The Server
The initial step is to run an audit of your server. Understanding what’s running on your system – just as where said system’s weaknesses lie – is fundamental to securing a VPS. Fortunately, there’s no deficiency of tools intended to complete such an audit – for one-time auditing and solidifying; you could utilize tools such as Bastille or the Linux Security Auditing Tool. Likewise, you could set up an automated, regular auditing framework through Log watch. For external/remote audits, use N-Map and Nessus Vulnerability Scanner.
If you want to know about the difference between the web server and application server, click on the link provided!
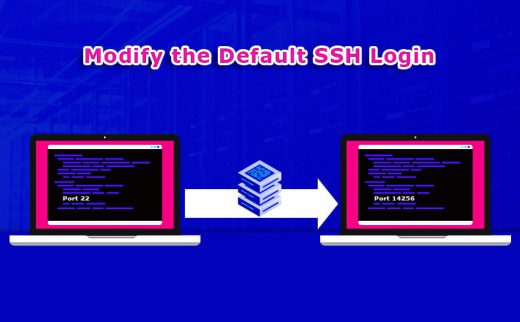
10) Modify The Default SSH Login
Numerous VPS clients use Secure Shell or SSH, a strategy for remote PC to-PC connection, to sign in to their servers.
If you utilize an SSH method to sign in to your server, there is a risk of a brute force attack. When a “brute force attack” happens, this implies somebody typically attempts to sign in to your SSH utilizing a variety of typical passwords. For this very cause, we suggest changing the default SSH 22 port login key to a tweaked one. For the most part, solid passwords comprise a mix of numbers, upper and lower-case characters, and non-alphanumeric characters.
If you aim to know the top vps hosting providers , check this article out!
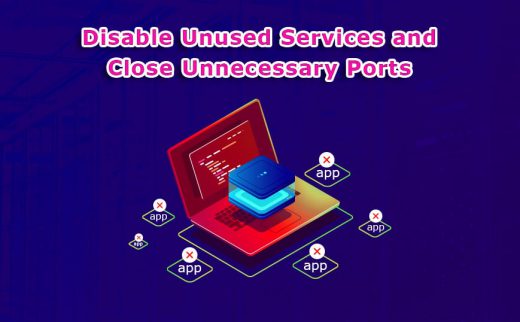
11) Disable Unused Services And Close Unnecessary Ports
Next, you need to investigate the applications and services running on your server. Ask yourself: is the entirety of your daemons carefully essential to make your VPS secure? If a specific daemon is necessary, it needs to be available to the world? If you’re running an assortment of unneeded applications, at that point, you’re making your worker altogether more vulnerable without any objective.
A good practice is to open whatever ports your VPS needs with ip tables; at that point, set the default strategy for the INPUT chain to “drop.” This will guarantee that any port you haven’t expressly stated to be open will be disregarded.
12) Utilize The Latest Software Versions
You may likewise need to consider automating this cycle. Also, contingent upon the OS you use, you’ll utilize apt-get for Ubuntu and Debian or rpm/yum for Cent OS to perform updates. This can be automated by cron jobs, a Linux-based utility that schedules a script or command on your VPS to run at a predetermined date and time or through the control panel.

13) Eliminate Unwanted Packages/Modules
14) Set Up Your Firewall

15) Implement Antivirus Programming
16) Perform Frequent Backups

17) Use SSL Certificates for Everything
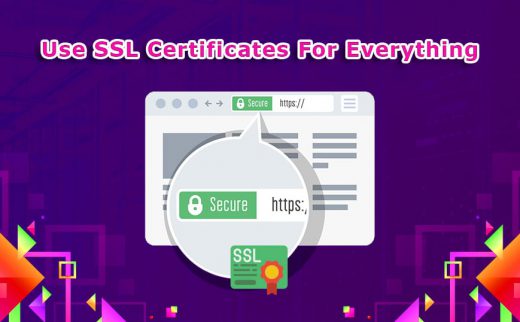
SSL certificates assist you with making an encoded channel between the client and server to guarantee that nothing upsets your privacy.
SSL authentications are vital to each hosting to guard your sensitive information, regardless of whether that is transmitting documents, entering your login details, or sending emails.
To effectively implement SSL certificates, however, some technical ability is required. For this situation, it’s necessary to employ a system administrator to oversee everything for you and give you added peace of mind. for more detailed information on what is an ssl certificate how does it work, please read the source of our article.
Lastly, regardless of whether it’s VPS Hosting, Dedicated Server, or Shared Hosting, Hosting, regardless of which type you use for your site, VPS Secure needs to stay top of mind consistently. This ranges from creating complex passwords, using 2FA authentication where available, evading the utilization of third-party software just as trying not to open email attachments from suspicious accounts.
Frequently Asked Questions
Is VPS Safe?
When it comes to VPS security, it is better to remember that VPS is as secure as other types of servers. It would be an excellent solution to allow only normal users to log in to the server and then provide superuser logins.
Conclusion
now, you know how to secure your vps. Modern VPS hosting service providers take utmost care to protect customer data with a high level of VPS security. It is good to be aware of some of the hidden backdoors. Use the given methods to upgrade your system to create a barrier between the hacker and your vital server files. Let us know in the comment box what steps you are taking to secure the VPS server.


