How To Start a WordPress Blog in 2022? (7 Easy Steps)
More than 39% of the websites on the web are powered by WordPress, including many top bloggers in various industries. With a small investment, you could achieve your goal and become one of the leading bloggers in your niche. Keep reading the step-by-step guide to learning to start a WordPress blog.
How To Create a Blog on WordPress?
If you aim to set up a WordPress blog, you would need web hosting that will hold all the documents, handle your domain, and take good care of your site. You can select any hosting provider from web research. Nowadays, many hosting services offer cheap WordPress hosting packages. You can buy them as cheap as $2.75 per month.
The lowest-priced option gives you no capitalization, free domain, an SSL certificate that will make your site more secure, an opportunity to install WordPress through a few clicks, and 24/7 support. Here are the steps on how to create a blog.
If you aim to know how does ssl work , check this post out!
1- Choose a Domain Name
The first step in create a blog using WordPress is choosing the perfect domain name. The URL of your blog will be a recognizable factor when someone searches for your brand name on the web. It is a permanent address where people come to enjoy your content. For example, www.n6host.com.
The name of your blog will play a key role in marketing. So put more effort into finding the unique name that suits your content. Personal blogging can be started with your name. You can register by putting your name, e.g., johnbare.com. Many bloggers prefer their names for their blogs. However, it is not always recommended as some may have a long name that is hard to pronounce and difficult to type on the keyboard. Remember, the shorter the name, it is easy to remember.
Alternatively, you can come up with a unique name for your brand. Find a short and simple name that sticks easily to the reader’s mind when they first hear it through marketing or recommendation.
For detailed information on what is wordpress website , read the source of our article.
2- Select a Hosting Plan
The next step in starting a website with WordPress is to choose the simple plan if you are a beginner because it will include all the fundamental requirements of the service of your site. It would help if you considered upgrading to the prime edition of your hosting plan until your blog takes off and begins attracting heavy traffic, which includes advanced features ideally suited to handle the massive inflow of traffic.
Suggest you read our article about web hosting cost per year
At the lowest price, the 12-month package provides the essentials. After all, hosting is a long-term commitment. In the beginning phases of your blog launch, you can often eliminate extra functionality from your package and bring them back later, whenever you find the need.
If you want to know about how to create a blog website , check this article out!
3- WordPress Installation
Modern hosting service providers offer WordPress as the quick installation software in the cPanel. It’s a one-click process, and it will be installed on your blog—no need to go through a series of technical steps to make it live.
Once logged in to your service, go to the quick software installation section. It is located at the bottom of the page. Next, choose the Quick WordPress install. Select the option and proceed ahead. In the next window, you will be redirected to the page where you can define the path of your folder. You can either install it in your root folder or create the subfolder “Blog” or whatever name you want to give to the folder.
After that, initiate the installation. The process would take a few minutes to complete. Once the installation is ended, you will be notified with the login page, user name, and password. You can visit the login page and use the given credentials to enter the admin panel.
If you are looking for the web hosting and wordpress hosting difference , don’t miss this post!
4- WordPress Configuration
Now it is time to make fundamental changes to meet the web standard and qualify for the search engine ranking.
Login
Go to the admin panel. Generally, the admin URL is accessible with the wp-admin URL, e.g., www.domain.com/wp-admin. Do not forget to replace the “domain.com” with your domain name. The path will take you to the login page of your blog. Put your credentials and enter them into the dashboard.
For more information about how to pick a good domain name , check this article out!
General Settings
Next, go to the Settings > General. You will be on the general setting page, where default information will be visible. Read the instruction on the left and change the input according to your requirements. For example, in the first field, “Site title,” add your blog name. In the second field, add the tag line. Mention your email address. You do not need to make changes to all given fields. Just complete the required changes and save the setting.
If you aim to know wordpress alternatives 2021 , this post can help you!
Reading Settings
The default setting will show you the post category and post type for displaying your article on the blog’s front page. If you choose to keep a static page, the front page will have only content related to the page you have selected.
Another option called the latest post creates the blog section on which the latest posts are placed at the top, and the rest goes below in order of new post to the older post. Changing the settings in the reading section will modify the appearance of your blog’s front page.
Discussion Settings
You should focus on two sections: “default article setting” and “before a comment appears.” The default article setting will allow you to activate or disable the comment section on the new post. The comment box will appear on each post if you enable the setting. People can share their feedback. Another section at the bottom will have the option to put the comment in the moderation queue.
Instead of putting the comment auto-approved on the live post, you should first review them to avoid spamming. Activate the setting “Comments must be manually approved” to get all the comments for approval. You can later check each comment submitted on the post and decide on the approval based on the relevancy.
For detailed information on blog vs website difference please read the source of our article.
5- Install Recommended Plugins
It is an excellent practice to start with the default plugin and extend the blog features. Here are some of the useful plugins that help you keep your blog safe from spamming and enhance the quality of your blog.
1- Akismet
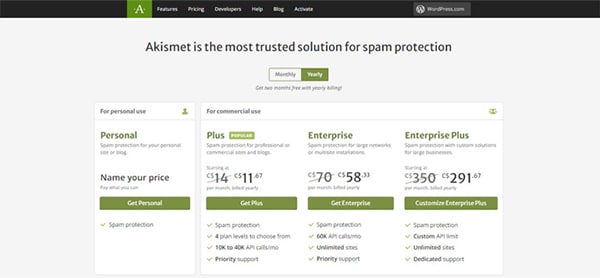
Akismet plugin fights the active spam. It has protected millions of websites from comment and contact spam.
2- AddThis

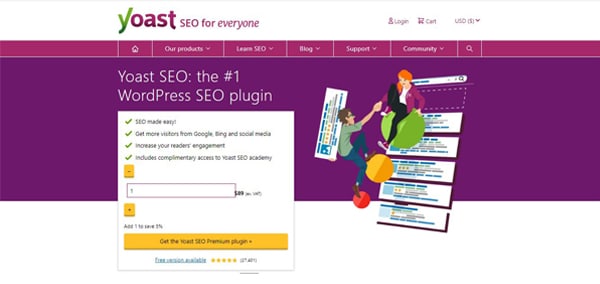
3- Yoast
4- VaultPress
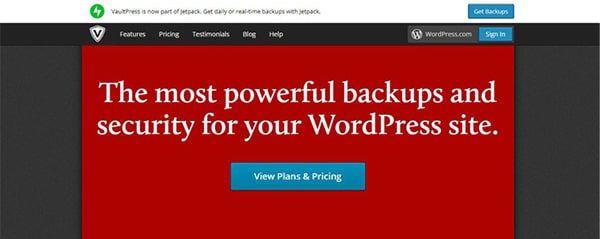
Security is the biggest concern for websites. Anything can happen overnight, and all your data will vanish in a blink of an eye. Protection is needed for your blog when you will put several hours of hard work into building the site and writing content.
Vaultpress offers subscription-based protection. Your website is monitored for security threats, and backup is taken periodically to avoid data loss. The process runs automatically in the background, so you do not have to worry about the manual backup.
6- Choose Your WordPress Theme
You will now be given a choice to choose a theme. Pick one that fits your product and best reflects your website. If either of the options shown fit, check the repository of WordPress to choose a theme from the choices offered there.
If you aim to know how to choose a wordpress theme , check this article out!
7- Start Blogging
Now you have reached the point where you can begin writing and publishing your content. However, there are a few more things that you should take care of before publishing your first post.
Delete the Sample Page and Post
When you install the WordPress package, it comes with sample pages and posts to demonstrate how the post and page will look on your blog. Before posting the content, delete the sample pages and post, or else it will get an index on the search engine rated the low-quality pages.
Create Your First Post
Format the post according to your need, and once you are satisfied with the content structure. You can use the preview button to check the content and how it will look on the live blog page. If you think everything looks good, click the publish button next to preview to make your post live. Your post will go live instantly. You can view your post by going to your blog’s home page. If you have put the static page, the post will be in the selected category section. Your journey has begun to become the number one blogger in your field. Keep writing and posting good content that adds value to your users.
If you are looking for the best wordpress discussion forum plugin , this article can help you!
Setting Up a Free Blog Using WordPress
Getting a self-hosted blog may be redundant on rare occasions. Some users would never need complete control over their platform, no matter the advantages that come with it. They’re not going to have to turn and configure themes or use different plugins. Many users don’t care about learning about WordPress. They don’t want to download and take care of it on their own; all they want is a platform that will enable them to write articles.
So the other choice when beginning a blog is to sign up for a free WordPress.com account. Over the next few minutes, after completing this, you can start writing your first post. You’re not going to have to think about domain names, hosting space, or managing your site backups.
So, if you are wondering how to start a WordPress blog for free, go through this:
Go to WordPress.com
Click on the “Get Started” button
Choose the type of website you want to create (blog, website, portfolio, or online store)
Select a them
Enter the name of your site and choose the first free option
Choose the “Start with Free“
Fill in the required information
Click on the “Create my account” button
From the very first minute after clicking the button, your site will be created by flexible machines. You should log in to the blog right now and start operating. Furthermore, you can alter themes, add widgets, and build new posts.
Suggest you read our article about what is bbpress plugin
Frequently Asked Questions
Are WordPress Blogs Free?
Self-hosted WordPress (which means wordpress.org) is a free platform that you can utilize for creating your blog.
Does WordPress Blog Cost Money?
The software itself is free and you can download it easily. But if you are going to use the platform (wordpress.com) to create free WordPress blog, you need to buy a hosting plan and also register your domain name.
suggest you read our article about top wordpress security plugins
Conclusion
This article shows you how to make a blog on WordPress. While for some people the free account would be just enough, you should know that there is a possibility of updating. WordPress.com has many plans that you can choose from, though you will likely need to update if you get a little more serious about your blog: You’ll get a custom domain, Jetpack custom features, additional space, access to new themes, support, upgrades, and more if you want to improve your account. Now the business plan also helps you to add custom themes and plugins. But take the time to go through all the alternatives to see which plan suits you best. For more detailed information check this post out!


